From console to mobile
But what happens when we face real people/world problems? for sure, there are still console apps out in the wild, but nowadays all the successful applications have a mobile version, why yours shouldn't have one? In this post I'll try to show you how to go from console to mobile (using Xamarin.Forms) with a simple example, it's a bit long but I'll make it worth the reading.
Console
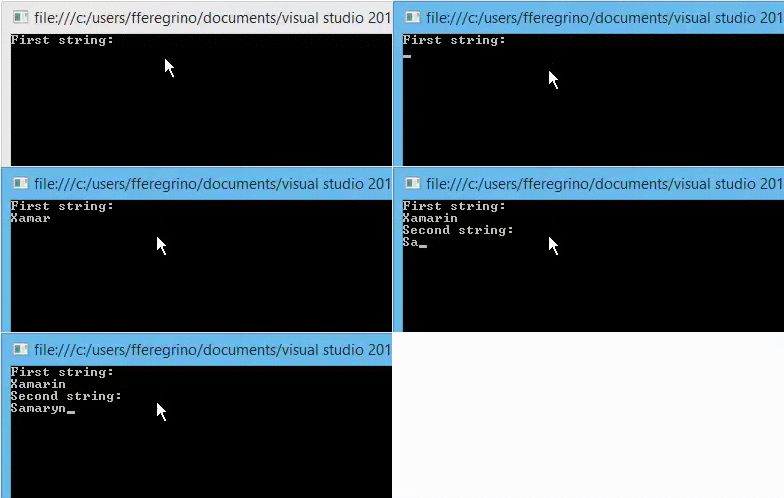
I'd like to start by introducing the app that we'll transform to mobile, this app takes two strings and returns a number indicating the "distance" between them using the Levenshtein distance algorithm, for example:
| str1 | str2 | Distance |
| ant | aunt | 1 |
| Samantha | Sam | 5 |
| Xamarin | Samaryn | 2 |
I'll use the implementation from Dot Net Perls, which is a nice static method that we can easily call in our program. Now, in a console app we ask the user for input with Console.ReadLine() in this case we'd use something like this:
static void Main()
{
	Console.WriteLine("First string:");
	string str1 = Console.ReadLine();
	Console.WriteLine("Second string:");
	string str2 = Console.ReadLine();
	int distance = Compute(str1, str2);
	Console.WriteLine("Distance: " + distance);
}
Some differences
Entry point
As we have seen before, our program has an entry point (the Main method) whereas for mobile every platform has its own entry point, not necessarily a Main method. Other important thing is that for a console app we tend to write most of the application logic inside the entry method, while the entry method for a mobile application runs code that usually isn't user provided code.
Controls
Something that users are looking for is having a nice UI to interact with the app, in the console user must interact sequentially, in our example a user that has entered the first string cannot go back to modify it. Or think about what happens if for some reason the user wants to type the second string before the first one? In a mobile app we can solve this problem by using controls, with them we can forget about Console writing or reading.
A control is one of the many ways to receive user interaction or to provide feedback to the user about what is happening. In our example we will replace both Console.ReadLine for a pair of Entry controls and the Console.WriteLines for Labels. The controls are available for user interaction at any time.
Event oriented programming
There are few user interactions that we can handle when programming a console applications, the user can only enter text, use the keyboard arrows or press the enter key. On the other hand if we use controls in our mobile app a whole lot of user interactions can be made. When a user interacts with a control an event is fired, we as programmers provide code to handle such events. We call that "event oriented programming" since the behaviour of our app is driven by the events we choose to handle.
Xamarin.Forms
So, what is Xamarin.Forms? in a few words it is a tool provided by the Xamarin Platforms that allows us to share even more code when writing an app. Xamarin.Forms (I'll be calling it just "Forms" from now on) provides a set of common controls to write our application interface once and have it work on the three major mobile platforms. The controls we create using Forms are rendered to platform specific controls in order to take advantage of each operating system capabilities. For example: if we develop using the traditional approach we must work on the UI three times (each for every operating system).
As I mentioned before, the Levenshtein app will have two text input boxes, three labels and one button. If we had chosen the traditional approach we'll had to write six text input boxes (two for each platform), three buttons (again, one for each platform). Look at the table below to see what the controls we'll be using render to:
| Forms | Android | iOS | Windows Phone |
| Button | Button (View) | UIButton (UIControl) | Button (Control) |
| Label | TextView (View) | UILabel (UIControl) | TextBlock (Control) |
| Entry | EditText (View) | UITextField (UIControl) | TextBox (Control) |
Hands on code
Since I want to show all three platforms I'll be using Visual Studio 2013 to create the project but this could be easily replicated using Xamarin Studio if you only want to deploy to certain platform.
Creating the project
To create the project we'll use the Mobile Apps template that comes with Xamarin Platform installation. To do this once Visual is open go to File > New > Project and select Mobile Apps and then Blank App (the one that says "portable"). Assign your project a name and let VS do its magic. It shouldn't take long, after it finishes we'll end up with a structure like the one below.

You can see that there are 4 projects, three of them ending with a suffix indicating the platform they are specific to. The other one is a portable class library (from now on "PCL") which will contain most of our code. You also must notice that the name of the PCL is highlighted with a bold font, it means that the PCL is set as the startup project.
Running the startup project
The startup project is the project that will get executed once we click the "Play" button o the upper part of our IDE, we can change the startup project by right-clicking on the project we want to set and choosing the corresponding option.
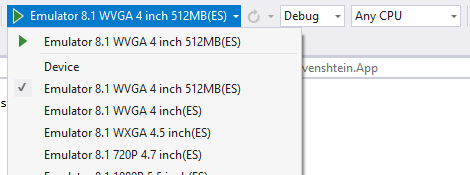
Depending on what kind of project have we selected as startup, a different set of options will be available to run our project, let's keep it simple and set the Windows Phone project as the startup one. Set the emulator as the target device and hit Play to build and run the app.

What's inside a Xamarin.Forms app
Let's go back to the PCL project, in it we'll find a file named App.cs it contains the App class which we can see as the "entry point" for our Forms app, I quoted entry point because it isn't true: as I said before, every platform has its own entry point. But for now we'll see the App.cs file as if it were.
The App class has a constructor where we must create the content that the user will see on its device once our app has finished loading. This time we'll be using C# to create the interface but it is easy to switch from a code-based interface to a XAML-based one.
Adding controls
Look at this:// Class constructor
public App()
{
// The root page of your application
MainPage = new ContentPage
{
Content = new StackLayout
{
VerticalOptions = LayoutOptions.Center,
Children = {
new Label {
XAlign = TextAlignment.Center,
Text = "Welcome to Xamarin Forms!"
}
}
}
};
}It is easy to understand what is happening over there, MainPage tells the app that a ContentPage should be the first thing te user see. At the same time, that ContentPage has a StackLayout (as its name suggest, whatever we put in that layout will appear stacked in the order we add them to it). The Children property is initialized jsut to a Label with an alignment rpoperty and a Text property set to the string "Welcome to Xamarin Forms!". We can start from here to buid our app. Erase everything inside the App constructor we'll write something useful:
Start by creating a new ContentPage, and name it xevenshteinMainPage, and a new StackLayout and name it mainLayout.
public App()
{
	ContentPage xevenshteinMainPage = new ContentPage();
	StackLayout mainLayout = new StackLayout();
Next let's create some controls, we'll create two Entry, three Label and a Button, we'll declare the controls outside the App constructor since we'll need them outside the constructor. Always try to give your controls and variables meaningful names. Add this code above the class constructor:
Button computeButton;
Label firstStringLabel, secondStringLabel, computationResultLabel;
Entry firstStringEntry, secondStringEntry;

// Class constructor
public App()
{
By this point we have done a lot, but our controls aren't created yet, the following code will do so. Notice that some controls are created using property initializing, it allows us to set some properties at the time of instantiation instead of doing it later. The following code is supposed to be after the creation of the mainLayout.
	// ... Above is the instatiation of mainLayout

    computeButton = new Button { Text = "Compute" };
    firstStringLabel = new Label { Text = "First string" };
    secondStringLabel = new Label { Text = "Second string" };
    computationResultLabel = new Label { Text = "No distance calculated yet" };
    firstStringEntry = new Entry();
    secondStringEntry = new Entry();
Our controls are created now! but they don't appear on the page if we run the app. That is because we haven't told our code to show them. In the following code we tell the code to add them to the view, see how we are using the Children property of the mainLayout to add the controls in the order we want them to appear, later, we set the mainLayout as the content of the xevenshteinMainPage and a line below we also set the xevenshteinMainPage as the MainPage for our app.
	// ... Above is the instatiation of secondStringEntry

	mainLayout.Children.Add(firstStringLabel);
    mainLayout.Children.Add(firstStringEntry);
    mainLayout.Children.Add(secondStringLabel);
    mainLayout.Children.Add(secondStringEntry);
    mainLayout.Children.Add(computeButton);
    mainLayout.Children.Add(computationResultLabel);

    xevenshteinMainPage.Content = mainLayout;
    MainPage = xevenshteinMainPage;
By this point the controls we've created appear when running the app, when we interact with them some events get fired, it is time for us to handle an event and add behaviour to the app. In particular, we want to know when the user presses the "Compute" button, thus we must add an event handler to the click event, inside the event handler we will perform the calculation and show the result on the screen. We do so by creating a method that receives two parameters (object and EventArgs), after that using the += operator we add it to the Clicked check out the following piece of code.
//
	computeButton.Clicked += ComputeButton_Clicked;
}

void ComputeButton_Clicked (object sender, EventArgs e)
{
	string str1 = firstStringEntry.Text;
	string str2 = secondStringEntry.Text;
	int distance = Xevenshtein.Algorithm.LevenshteinDistance.Compute(str1, str2);
	computationResultLabel.Text = "Distance: " + distance;
}
Run the project and that's it! you have now created your first Xamarin.Forms app, if you ever need help with any of the steps above please let me know. I have uploaded all the code to GitHub so you can check my working solution. From here you now may want to style your app or dig a bit more into app lifecycle.